Difference between revisions of "Hunting Missions"
(→How to do a Zeph Mission?) |
(→Doing Zeph mission) |
||
| Line 68: | Line 68: | ||
*Take note that certain mobs may look the same (or almost the same), and have the same names. This means that you need to kill the correct mob with the monster ID indicated by the @mission command. This is a common mistake made by new players that often leads to unnecessary frustration. | *Take note that certain mobs may look the same (or almost the same), and have the same names. This means that you need to kill the correct mob with the monster ID indicated by the @mission command. This is a common mistake made by new players that often leads to unnecessary frustration. | ||
**A good example of this would be '''Picky'''. There are two mobs that share the same name. However, they have different monster IDs. 1049 and 1050 respectively. They may look almost the same, but they have something different between them. One wears an eggshell hat (1050) on its head, and the other (1049) does not wear anything on its head. | **A good example of this would be '''Picky'''. There are two mobs that share the same name. However, they have different monster IDs. 1049 and 1050 respectively. They may look almost the same, but they have something different between them. One wears an eggshell hat (1050) on its head, and the other (1049) does not wear anything on its head. | ||
| + | *If you're using @whereis and see a map that has 150 of a certain mob, but after warping into the map you can't find any, most likely is that the mob you're looking for has already evolved. To make the mob that you're looking for spawn, make sure to kill the evolved versions first. | ||
| + | **An example would be Fabre. It spawns in prt_fild06, with 140 spawns. If you arrived there and only find a handful of Fabres, but notice a lot of Pupa and Creamy, you need to kill those two mobs first to make Fabres spawn again. | ||
<br><br> | <br><br> | ||
After hunting all the mobs in the '''@mission''' list, you can now go back to the Zeph NPC and collect your rewards! | After hunting all the mobs in the '''@mission''' list, you can now go back to the Zeph NPC and collect your rewards! | ||
[[File:ScreenDreamerRO020.jpg|thumb|none|Zeph ended.]] | [[File:ScreenDreamerRO020.jpg|thumb|none|Zeph ended.]] | ||
<br><br><br> | <br><br><br> | ||
Revision as of 08:54, 12 September 2024
Contents
Introduction
This is a guide explaining how to do Zeph Missions in BraveRO. Here you can find all of the useful commands on how to complete these Zeph Quest missions.
Zeph NPC location
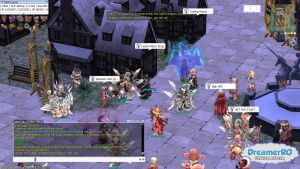
The Death match Shop is located in our main city @go 0 (Caspen) @warp caspen 152 200.
List of NPCs inside Death Match Shop
When inside, you will find 3 NPC's:
- Zeph NPC - talk to Zeph to begin your hunting mission.
- Death Match Manager NPC - sells various items using DM (Death Match) Points as currency.
- Broadcast NPC - for a small fee, you can send a broadcast message to the entire server. Take note to follow the guidelines indicated by the NPC.
How to do a Zeph Mission?
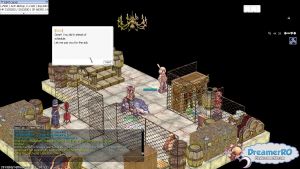
Click on the Zeph NPC.
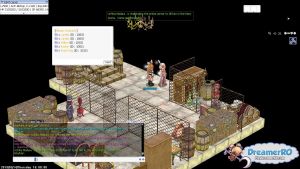
Once you accept the Zeph Mission, there is a time limit of 60 minutes to complete it. You can see the list of mobs you need to kill in order to complete this mission by using the @mission command. Previously, there's a cooldown to doing Zeph Missions. This cooldown is the remaining time you have left from completing the last Zeph Mission. However, as of March 3, 2024, this cooldown has been removed.
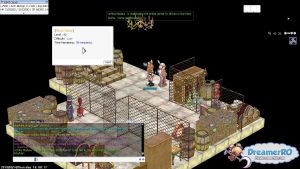
Zeph Missions will increase in levels and difficulty for every successful mission. This means that as you complete more and more Zeph Missions, the number of mobs that you need to hunt, and the difficulty of finding them will increase. Early on, every 40+ Zeph Missions that you have completed, the difficulty level of your Zeph Missions will reset to a lower level. However, there will come a point after you've completed a lot of Zeph Missions that the difficulty level of your missions will remain high, thus you get more rewards, but you still have to contend with hard to find mobs from time to time.
- Level - This is often used as a gauge in handing out rewards during seasonal events whenever Zeph Missions are involved. Higher levels will reward more event items.
- Difficulty - The number of mobs that you need to hunt, and the rarity of each will steadily increase. While some mobs that you need to hunt have 100+ in a map, some may have 10 or less.
- Time remaining - if you run out of time before hunting all mobs or you fail to return to the Zeph NPC before the time is up, you fail the mission and you can't get any reward.
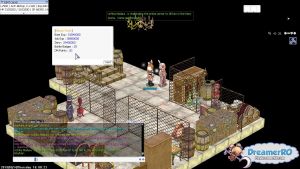
You can also see the mission's rewards for every Zeph mission you complete.
Usable commands for Zeph
- @mission
- Used for checking the list of mobs that you need to hunt. This also shows the monster's ID.
- @whereis <mobID/Name>
- Shows the list of maps where a certain mob is located. You generally want to go to the map where a mob has the highest amount. To use this command, for example, you can type @whereis 1001 or @whereis poring. You have to use either a monster's ID or name. The monster's ID is already being provided by the @mission command.
- @aloot <itemID/Name>
- Automatically loots a particular item that you have set this to. By default, all characters will autoloot all items. You have to turn this off first by typing @aloot rate 0. Afterwards, you can now use the @aloot command. For example, @aloot item 1011 or @aloot item mace.
- @aloottype +/-
- This autolooting command loots a particular item group. A number is assigned for various items groups. You can simply type @aloottype to see the numbers for the other item groups. As an example, if you wish to loot only cards, you can use @aloottype +6. Using the + sign adds the item group into your looting list. Using the - sign removes that item group from your looting list.
Doing Zeph mission
When doing Zeph Missions, it's highly recommended to use classes with long range and/or wide area-of-effect skills.
For new players, the following classes are recommended because they're cheap and easy to use:
- Wizard Classes - generally use Storm Gust and Lord of Vermillion for fast killing mobs.
- Hunter Classes - preferably Rangers because of their access to Arrow Storm skill, an area-of-effect skill. As a benefit of using bows, this class can snipe monsters that are on a cliff/ledge that you can't normally hit with a skill or melee attack.
- Rogue Classes - you will need to use a bow. As a hybrid class of sorts, you can dip into the best bits of a Wizard and Hunter. Since you can use bows, you can snipe monsters from a cliff/ledge. Using your Plagiarism passsive skill to copy a Wizard's Storm Gust or Lord of Vermillion, and Preserve buff to prevent the copied skill from being overwritten, you can now enjoy the constant use of an area-of-effect skill, similar to a Wizard.
For seasoned players that can invest a bit of Zeny into gears, the following classes are recommended because of they can easily hit and kill mobs in a very large area, all thanks to the Illusion Doping skill. You can check out this Illusion Doping Zeph Farming Build to know what items you should aim for.
- Genetics
- They have access to arguably one of the best skills to use in Zeph Missions, the Illusion Doping skill. This skill, at max level, generally hits every mob within your screen.
- If there are any obstacles (wall/trees) between the mob you cast Illusion Doping on and another mob, that mob won't get hit.
- If you have saved a bit of Zeny, then you can start using a Genetic or Shadow Chaser. Why do you need to have Zeny you ask? Well, it's simply because this skill uses 1x Alcohol per cast. Before discounts, Alcohol is being sold by the Alchemist Tool Shop inside @go 48, and it costs 250,000 Zeny.
- By itself, Illusion Doping hits like a wet noodle. However, if you build your stats and items properly, you can maximize its damage.
- Shadow Chasers
- You get the same benefits as indicated in the Rogue description above. However, this time around, you now have access to the Reproduce skill, which allows you to copy certain 3rd Job Skills, including the Illusion Doping skill of a Genetic, as described above.
If you killed the correct mob in your hunting list, it will display the current amount left to hunt for that particular mob.
- Take note that certain mobs may look the same (or almost the same), and have the same names. This means that you need to kill the correct mob with the monster ID indicated by the @mission command. This is a common mistake made by new players that often leads to unnecessary frustration.
- A good example of this would be Picky. There are two mobs that share the same name. However, they have different monster IDs. 1049 and 1050 respectively. They may look almost the same, but they have something different between them. One wears an eggshell hat (1050) on its head, and the other (1049) does not wear anything on its head.
- If you're using @whereis and see a map that has 150 of a certain mob, but after warping into the map you can't find any, most likely is that the mob you're looking for has already evolved. To make the mob that you're looking for spawn, make sure to kill the evolved versions first.
- An example would be Fabre. It spawns in prt_fild06, with 140 spawns. If you arrived there and only find a handful of Fabres, but notice a lot of Pupa and Creamy, you need to kill those two mobs first to make Fabres spawn again.
After hunting all the mobs in the @mission list, you can now go back to the Zeph NPC and collect your rewards!
