Difference between revisions of "Battlegrounds"
(→Battleground Gear NPCs) |
(→Conquest) |
||
| (82 intermediate revisions by 2 users not shown) | |||
| Line 1: | Line 1: | ||
==Overview== | ==Overview== | ||
| − | Battleground is a PVP system which you and other players will team up with one of the two leaders, General Guillaume ( | + | Battleground is a PVP system which you and other players will team up with one of the two leaders, General Guillaume (Blue/Lion side) or Prince Croix (Red/Eagle side). Playing battlegrounds can be rewarding with battleground exclusive gears, consumables, and even donation gears. |
Go into the Battle Room by clicking Battle Recruiter in Caspen or type @go bg for shortcut. | Go into the Battle Room by clicking Battle Recruiter in Caspen or type @go bg for shortcut. | ||
[[File:Prince croix.jpeg|thumb|right|Prince Croix]] | [[File:Prince croix.jpeg|thumb|right|Prince Croix]] | ||
[[File:General guillaume.jpeg|thumb|right|General Guillaume]] | [[File:General guillaume.jpeg|thumb|right|General Guillaume]] | ||
| − | [[File:Battleground recruit.jpg]] | + | [[File:Battleground recruit.jpg|thumb|none|''@warp caspen 161 217'']] |
* Click on Battle Recruiter or type @joinbg to automatically join the queue. | * Click on Battle Recruiter or type @joinbg to automatically join the queue. | ||
* You must wait in any city for the queue. | * You must wait in any city for the queue. | ||
| Line 14: | Line 14: | ||
* There will be 9 battlegrounds arenas and each round will start at random arena. | * There will be 9 battlegrounds arenas and each round will start at random arena. | ||
* Win or lose, players will still be rewarded. | * Win or lose, players will still be rewarded. | ||
| − | * | + | * Battlegrounds is open for queuing 24/7. |
| + | <br><br> | ||
| + | '''Old Schedule:''' In the past, Battlegrounds is only open for 1 hour during set times.<br> | ||
[[File:Battleground time.jpg]] | [[File:Battleground time.jpg]] | ||
| + | <br><br> | ||
==System== | ==System== | ||
| Line 26: | Line 29: | ||
* Battleground follows WoE mechanics by which some skills can't be used in battlegrounds. | * Battleground follows WoE mechanics by which some skills can't be used in battlegrounds. | ||
* Stand still for more than 10 seconds without doing anything will trigger AFK message to everyone but once you move, the AFK indicator will go away otherwise you will be kicked out of the round and have 8-10 minutes penalty before joining another round. | * Stand still for more than 10 seconds without doing anything will trigger AFK message to everyone but once you move, the AFK indicator will go away otherwise you will be kicked out of the round and have 8-10 minutes penalty before joining another round. | ||
| + | <br><br> | ||
| + | ==Teams== | ||
| + | After queueing for a battleground, aside from Triple Inferno, you will be placed in one of two teams. To further check, your team will have a guild logo that has the team's color. | ||
| + | *[[File:bgblueteam.png|link=]] '''Blue Team''' - has a lion symbol<br><br> | ||
| + | *[[File:bgredteam.png|link=]] '''Red Team''' - has an eagle symbol | ||
| − | ==Battleground Arenas and Objectives== | + | <br> |
| − | + | Your team's score, points, or remaining lives are displayed in the upper right side of your screen, beside the map. | |
| − | * Score | + | <br><br> |
| + | |||
| + | =='''Battleground Arenas and Objectives'''== | ||
| + | ====Capture the Flag==== | ||
| + | * Score points by capturing the enemy flag and bring it to your base flag. | ||
| + | * For each successful flag capture, your team earns 1 point. The first team to reach 3 points will win. | ||
* If the enemy capture your flag, you can kill the flag carrier and return your flag to your base. | * If the enemy capture your flag, you can kill the flag carrier and return your flag to your base. | ||
| + | <br> | ||
| + | Additional Info: | ||
| + | *The ''flags'' may look like Crystals. | ||
| + | *You can capture the enemy flag/crystal by touching it with your character. After doing this, return to your base and touch your team's flag/crystal with your character to successfully capture the flag and score a point. | ||
| + | *There will be a '''"HELP"''' emoticon above the character who picks up the flag/crystal. It is highly advisable that your team protects the player carrying the flag or kill any enemies trying to kill your team's flag carrier. | ||
| + | *While you carry the flag/crystal, you will not be able to heal, and use skills. Your HP will drain over time as well. | ||
| + | *This game mode has a chance to end up in a tie. When this happens, both teams lose. | ||
| − | + | <br> | |
| − | + | <hr> | |
| − | |||
| + | ====Team Death Match==== | ||
| + | * Each team will be given 50 lives. | ||
| + | * Kill the enemy team players until their lives reach 0 to win. | ||
| + | <br> | ||
| + | Additional Info: | ||
| + | *A pretty straightforward Battleground mode. | ||
| + | <br> | ||
| + | <hr> | ||
| − | + | ====Stone Control==== | |
* There will be 6 stones in the middle of battlefield. | * There will be 6 stones in the middle of battlefield. | ||
| − | * Capture as many stones as possible and bring them to your base to earn points. | + | * Capture as many stones as possible and bring them to your base to earn points. |
| − | * While you carry the stones, you will not be able to heal, use skills | + | * While your team has captured stones, each stone will continuously earn your team 1 point every few seconds. |
| − | * There will be "HELP" | + | * The more stones that a team controls, the faster they will earn points. |
| + | * While you carry the stones, you will not be able to heal, and use skills. Your HP will drain over time as well. | ||
| + | * There will be a '''"HELP"''' emoticon above the character who pick up the stone and it is advisable to tell your team to protect you while carrying the stone or kill the enemy players. | ||
* First team that reach 100 points wins the game. | * First team that reach 100 points wins the game. | ||
| + | <br> | ||
| + | Additional Info: | ||
| + | *At the beginning of the match, there are six stones around the middle of the map. Your team has to get as much as you can. | ||
| + | *Each player can only carry one stone at a time. | ||
| + | *You can capture a ' '''stone''' by walking towards them and touching them with your character. Once you've done this, go back to your team's base and deposit the stone by walking towards one of the six flames in your base. This same method can also be done to capture or steal the stones that your enemy have in their base. | ||
| + | *Since your enemy can also steal your team's stones, you have to defend your team's stones from getting stolen. A common strategy is using Rangers and Super Novice to set up traps around the stones and all over the base. Skills that slow down enemies movement, such as Decrease Agi, and Quagmire are useful to give your team time to kill any enemies that might have stolen some of your stones. Area of Effect skills such as Storm Gust, and Lord of Vermillion are useful to control areas and slightly slow your enemies advance or escape. | ||
| + | <br> | ||
| + | <hr> | ||
| − | + | ====Eye of Storm==== | |
| − | |||
* There will be two bases that you can control on the battlefield. | * There will be two bases that you can control on the battlefield. | ||
* Stay within the base area to dominate it. | * Stay within the base area to dominate it. | ||
| Line 53: | Line 89: | ||
* Earn extra points by capturing the flag in the middle and bring it to your base. | * Earn extra points by capturing the flag in the middle and bring it to your base. | ||
* First team that reach 100 points wins the game. | * First team that reach 100 points wins the game. | ||
| + | <br> | ||
| + | Additional Info: | ||
| + | *You can '''capture''' the flag in the middle of the map by attacking it. | ||
| + | *There will be a '''"HELP"''' emoticon above the character who pick up the flag. It is advisable to tell your team to protect you while carrying the stone or kill the enemy players. | ||
| + | *The player that has the flag must then move towards the base that their team controls. You will capture the '''flag''' by walking towards and touching the flag in either north or south base, whichever your team has control of. | ||
| + | *While you carry the flag, you will not be able to heal, and use skills. Your HP will drain over time as well. | ||
| + | <br> | ||
| + | <hr> | ||
| − | + | ====Bossnia==== | |
* Attack enemy base and destroy each MVP guardian to earn points. | * Attack enemy base and destroy each MVP guardian to earn points. | ||
| − | * You must capture Balance Flag in the middle to do damage to the guardian. | + | * You must capture Balance Flag in the middle of the map to do significant damage to the guardian. |
| + | * Each successful enemy MVP Guardian kill will give your team 1 point. | ||
* First team that reach 5 points wins the game. | * First team that reach 5 points wins the game. | ||
| + | <br> | ||
| + | Additional Info: | ||
| + | *To capture the flag in the middle of the map, you and your team must damage it. Once your team successfully captures the flag, it will be renamed as either Blue or Red, depending on which team captured it. | ||
| + | *While a team controls the flag in the middle, that team will be able to significantly damage the MVP in their enemies' base. If you did not capture the flag, the damage you and your team deals to the MVP is low. | ||
| + | *After a team kills an MVP, the flag ownership in the middle will reset and it's once again a race to capture it. Take note that even though a team has already captured the flag in the middle, the opposing team can always steal the flag ownership by damaging it. | ||
| + | *This Battleground mode is often the fastest to complete, considering the objective is fairly straightforward. In the event that this mode drags on, some teams may consider defending their team's MVP to prevent enemies from killing it. | ||
| + | <br> | ||
| + | <hr> | ||
| − | + | ====Domination==== | |
| − | |||
* There will be three bases that you can control on the battlefield. | * There will be three bases that you can control on the battlefield. | ||
* Dominate as many bases as you can to earn points. | * Dominate as many bases as you can to earn points. | ||
* First team that reach 100 points wins the game. | * First team that reach 100 points wins the game. | ||
| + | <br> | ||
| + | Additional Info: | ||
| + | *You team will be able to capture a base by having one or more characters stand near the base flag. | ||
| + | *Likewise, the enemy team can steal base by occupying it with their team members. | ||
| + | <br> | ||
| + | <hr> | ||
| − | + | ====Triple Inferno==== | |
* There will be three teams, your team and the other two are enemies. | * There will be three teams, your team and the other two are enemies. | ||
* Collect enemy/teammate skulls and bring them to sacrifice totem to earn points. | * Collect enemy/teammate skulls and bring them to sacrifice totem to earn points. | ||
* If you are killed while carrying skulls, all the skulls will be dropped. | * If you are killed while carrying skulls, all the skulls will be dropped. | ||
* First team that reach 80 points wins the game. | * First team that reach 80 points wins the game. | ||
| + | <br> | ||
| + | Additional Info: | ||
| + | *You can collect skulls by touching them with your character. | ||
| + | <br> | ||
| + | <hr> | ||
| − | + | ====Conquest==== | |
| − | * If you are the attacker, destroy enemy defenses and | + | * If you are the attacker, destroy enemy defenses and break the Emperium/flag. |
* If you are the defender, defend your flag until time runs out. | * If you are the defender, defend your flag until time runs out. | ||
| + | <br> | ||
| + | Additional Info: | ||
| + | *At the beginning of the match you are randomly placed into either the attacker or defender team. | ||
| + | *If you're the attacking team, take note that you cannot immediately rush to the enemies' main base where their Emperium/flag is located. Your team must break the guardian stones first that are located around the map. | ||
| + | *If you're the defending team, make sure to defend the Emperium/flag by killing your enemies, setting traps, slowing their advance, etc. Furthermore, you can also defend the guardian stones. As long as the guardian stones remain intact, the enemy team cannot break into the room with the Emperium/flag. | ||
| + | *If you're the defending team, you can use the flags/portals located at a distance from the Emperium to warp to certain points of a map to defend the guardian stones, or attack enemies from behind. | ||
| + | <br> | ||
| + | <hr> | ||
| − | + | ====Rush==== | |
* Fight to capture the castle and organize your team to defend it. | * Fight to capture the castle and organize your team to defend it. | ||
* If you fail on the first capture, kill the defender and destroy the Emperium to win. | * If you fail on the first capture, kill the defender and destroy the Emperium to win. | ||
| + | <br> | ||
| + | Additional Info: | ||
| + | *At the start, both teams must race to the and break it. Whichever team breaks the Emperium, that team must then defend it. | ||
| + | *If your team failed to break the Emperium first, your team must then attack the team that holds the Emperium and break it. | ||
| + | *A common strategy in defending the room where the Emperium is located is by setting traps and spamming area of effect skills near the entrance portal. | ||
| + | <br><br> | ||
| − | ==Battleground | + | ==Battleground NPCs== |
| − | [[File:BG usables shop.jpeg| | + | ====[[File:BG usables shop.jpeg|thumb|none|Usable Shop]]==== |
| − | + | * ''See'' [[Battleground_Usable_Shop|Battleground Usable Shop]] ''for more details'' | |
| − | + | <br><br> | |
| − | + | ====[[File:BG headgear shop.jpeg|thumb|none|Headgear Shop]]==== | |
| − | + | * ''See'' [[Battleground_Headgear_Shop|Battleground Headgear Shop]] ''for more details'' | |
| − | + | <br><br> | |
| − | + | ====[[File:BG weapons shop.jpg|thumb|none|Weapons Shop]]==== | |
| − | + | * ''See'' [[Battleground_Weapon_Shop|Battleground Weapon Shop]] ''for more details'' | |
| − | + | <br><br> | |
| − | + | ====[[File:BG equipment shop.jpg|thumb|none|Equipment Shop]]==== | |
| − | + | * ''See'' [[Battleground_Equipment_Shop|Battleground Equipment Shop]] ''for more details'' | |
| − | + | <br><br> | |
| − | + | ====[[File:BG pyl.png|thumb|none|Press Your Luck]]==== | |
| − | + | * ''See'' [[Battleground_Press_Your_Luck|Battleground Press Your Luck]] ''for more details'' | |
| − | + | <br><br> | |
| − | + | ====[[File:doubledown.png|thumb|none|BG Double Down]]==== | |
| − | + | * Using the '''BG Double Down Token''', you can bet a certain amount of Victory Badges | |
| − | + | **For each bet, you will need 1x BG Double Down Token | |
| − | + | **You can bet a maximum of 3 Victory Badges. | |
| − | + | **If you win the next Batttlegrounds game, you will receive twice of what you've bet. If you lose, the Victory Badges will be lost. | |
| − | + | **Make sure not to logout after making a bet. If you logout or select another character, the Victory Badges that you've bet will be lost. | |
| − | + | **You can cancel your bet as long as you haven't joined any Battlegrounds yet after making a bet. If you chose to cancel, your BG Double Down Token, and Victory Badges will be returned. | |
| − | |||
| − | |||
| − | |||
| − | |||
| − | |||
| − | |||
| − | |||
| − | |||
| − | |||
| − | |||
| − | |||
| − | |||
| − | |||
| − | |||
| − | |||
| − | |||
| − | |||
| − | |||
| − | |||
| − | |||
| − | |||
| − | |||
| − | |||
| − | |||
| − | |||
| − | | | ||
| − | |||
| − | |||
| − | |||
| − | |||
| − | |||
| − | |||
| − | |||
| − | |||
| − | |||
| − | |||
| − | |||
| − | |||
| − | |||
| − | |||
| − | |||
| − | |||
| − | |||
| − | |||
| − | |||
| − | |||
| − | |||
| − | |||
| − | |||
| − | |||
| − | |||
| − | |||
| − | |||
| − | |||
| − | |||
| − | |||
| − | |||
| − | |||
| − | |||
| − | |||
| − | |||
| − | |||
| − | |||
| − | |||
| − | |||
| − | |||
| − | |||
| − | |||
| − | |||
| − | |||
| − | |||
| − | |||
| − | |||
| − | |||
| − | |||
| − | |||
| − | |||
| − | |||
| − | |||
| − | |||
| − | |||
| − | |||
| − | |||
| − | |||
| − | |||
| − | |||
| − | |||
| − | |||
| − | |||
| − | |||
| − | |||
| − | |||
| − | |||
| − | |||
| − | |||
| − | |||
| − | |||
| − | |||
| − | |||
| − | |||
| − | |||
| − | |||
| − | |||
| − | |||
| − | |||
| − | |||
| − | |||
| − | |||
| − | |||
| − | |||
| − | |||
| − | |||
| − | |||
| − | |||
| − | |||
| − | |||
| − | |||
| − | |||
| − | |||
| − | |||
| − | |||
| − | |||
| − | |||
| − | |||
| − | |||
| − | |||
| − | |||
| − | |||
| − | |||
| − | |||
| − | |||
| − | |||
| − | |||
| − | |||
| − | |||
| − | |||
| − | |||
| − | |||
| − | |||
| − | |||
| − | |||
| − | |||
| − | |||
| − | |||
| − | |||
| − | |||
| − | |||
| − | |||
| − | |||
| − | |||
| − | |||
| − | |||
| − | |||
| − | |||
| − | |||
| − | |||
| − | |||
| − | |||
| − | |||
| − | |||
| − | |||
| − | |||
| − | |||
| − | |||
| − | |||
| − | |||
| − | |||
| − | |||
| − | |||
| − | |||
| − | |||
| − | |||
| − | |||
| − | |||
| − | |||
| − | |||
| − | |||
| − | |||
| − | |||
| − | |||
| − | |||
| − | |||
| − | |||
| − | |||
| − | |||
| − | |||
| − | |||
| − | |||
| − | |||
| − | |||
| − | |||
| − | |||
| − | |||
| − | |||
| − | + | <br><br> | |
| − | + | <font color=red>'''Under Construction'''</font> | |
| − | + | <table style="height: 50px; width: 1000px;" border="1"> | |
| − | + | <tr> | |
| − | | | + | <th colspan="5"><span style="color: #4c64e0;"><strong><big><big>BATTLEGROUND NPCS</big></big></strong></span></th> |
| − | + | <tr> | |
| − | | | + | <td style="width: 50px; text-align: center;"><span style="color: #4c64e0;"><strong>'''NPC TYPE'''</strong></span></td> |
| − | + | <td colspan="5" style="width: 150px; text-align: center;"><span style="color: #4c64e0;"><strong>'''PURPOSE / USE'''</strong></span></td> | |
| − | | | + | </tr> |
| − | |- | + | <tr> |
| − | + | <td rowspan="2" style="width: 200px; text-align: center;">'''War Badge Shops'''</td> | |
| − | + | <td style="width: 200px; text-align: center;"> | |
| − | + | [[Battleground_Usable_Shop|Battleground Usable Shop]] | |
| − | + | </td> | |
| − | + | <td style="width: 200px; text-align: center;"> | |
| − | + | [[Battleground_Headgear_Shop|Battleground Headgear Shop]] | |
| − | + | </td> | |
| − | + | <td style="width: 200x; text-align: center;"> | |
| − | + | [[Battleground_Weapon_Shop|Battleground Weapon Shop]] | |
| + | </td> | ||
| + | <td style="width: 200px; text-align: center;"> | ||
| + | [[Battleground_Equipment_Shop|Battleground Equipment Shop]] | ||
| + | </td> | ||
| + | </tr> | ||
| + | <tr> | ||
| + | <td style="width: 50px; text-align: center;"> | ||
| + | Donation Gems Shop | ||
| + | </td> | ||
| + | <td style="width: 150px; text-align: center;"> | ||
| + | Donation Auras Shop | ||
| + | </td> | ||
| + | <td style="width: 150px; text-align: center;"> | ||
| + | Donation Wings Shop | ||
| + | </td> | ||
| + | <td style="width: 150px; text-align: center;"> | ||
| + | Donation Headgears Shop | ||
| + | </td> | ||
| + | </tr> | ||
| + | <tr> | ||
| + | <td style="width: 50px; text-align: center;">Baits</td> | ||
| + | <td style="width: 150px; text-align: center;"> | ||
| − | + | </td> | |
| + | </tr> | ||
| + | <tr> | ||
| + | <td style="width: 50px; text-align: center;">Baits</td> | ||
| + | <td style="width: 150px; text-align: center;"> | ||
| − | + | </td> | |
| + | </tr> | ||
| + | <tr> | ||
| + | <td style="width: 50px; text-align: center;">Baits</td> | ||
| + | <td style="width: 150px; text-align: center;"> | ||
| − | + | </td> | |
| − | + | </tr> | |
| + | </table> | ||
Latest revision as of 04:06, 4 November 2025
Overview
Battleground is a PVP system which you and other players will team up with one of the two leaders, General Guillaume (Blue/Lion side) or Prince Croix (Red/Eagle side). Playing battlegrounds can be rewarding with battleground exclusive gears, consumables, and even donation gears.
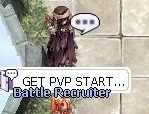
Go into the Battle Room by clicking Battle Recruiter in Caspen or type @go bg for shortcut.
- Click on Battle Recruiter or type @joinbg to automatically join the queue.
- You must wait in any city for the queue.
- 6 players are the minimum requirement to start the round otherwise the battle won't start.
- Each round can have a maximum of 60 players, being 30/30 on each sides.
- Capture flags, destroy Emperium, or kill enemy players to win.
- There will be 9 battlegrounds arenas and each round will start at random arena.
- Win or lose, players will still be rewarded.
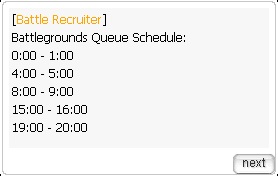
- Battlegrounds is open for queuing 24/7.
Old Schedule: In the past, Battlegrounds is only open for 1 hour during set times.
System
- Each round of battlegrounds will have a time limit.
- When you die, you will be warp to a special room until you re-spawn to the arena again.
- The special room will also contain an NPC to heal, access storage or repair any broken equipment.
- Playing battleground can reward you with war badge, silvervine fruit, and victory badge.
- Each battleground arenas will have different objectives.
- Battleground follows WoE mechanics by which some skills can't be used in battlegrounds.
- Stand still for more than 10 seconds without doing anything will trigger AFK message to everyone but once you move, the AFK indicator will go away otherwise you will be kicked out of the round and have 8-10 minutes penalty before joining another round.
Teams
After queueing for a battleground, aside from Triple Inferno, you will be placed in one of two teams. To further check, your team will have a guild logo that has the team's color.
 Blue Team - has a lion symbol
 Red Team - has an eagle symbol
Your team's score, points, or remaining lives are displayed in the upper right side of your screen, beside the map.
Battleground Arenas and Objectives
Capture the Flag
- Score points by capturing the enemy flag and bring it to your base flag.
- For each successful flag capture, your team earns 1 point. The first team to reach 3 points will win.
- If the enemy capture your flag, you can kill the flag carrier and return your flag to your base.
Additional Info:
- The flags may look like Crystals.
- You can capture the enemy flag/crystal by touching it with your character. After doing this, return to your base and touch your team's flag/crystal with your character to successfully capture the flag and score a point.
- There will be a "HELP" emoticon above the character who picks up the flag/crystal. It is highly advisable that your team protects the player carrying the flag or kill any enemies trying to kill your team's flag carrier.
- While you carry the flag/crystal, you will not be able to heal, and use skills. Your HP will drain over time as well.
- This game mode has a chance to end up in a tie. When this happens, both teams lose.
Team Death Match
- Each team will be given 50 lives.
- Kill the enemy team players until their lives reach 0 to win.
Additional Info:
- A pretty straightforward Battleground mode.
Stone Control
- There will be 6 stones in the middle of battlefield.
- Capture as many stones as possible and bring them to your base to earn points.
- While your team has captured stones, each stone will continuously earn your team 1 point every few seconds.
- The more stones that a team controls, the faster they will earn points.
- While you carry the stones, you will not be able to heal, and use skills. Your HP will drain over time as well.
- There will be a "HELP" emoticon above the character who pick up the stone and it is advisable to tell your team to protect you while carrying the stone or kill the enemy players.
- First team that reach 100 points wins the game.
Additional Info:
- At the beginning of the match, there are six stones around the middle of the map. Your team has to get as much as you can.
- Each player can only carry one stone at a time.
- You can capture a ' stone by walking towards them and touching them with your character. Once you've done this, go back to your team's base and deposit the stone by walking towards one of the six flames in your base. This same method can also be done to capture or steal the stones that your enemy have in their base.
- Since your enemy can also steal your team's stones, you have to defend your team's stones from getting stolen. A common strategy is using Rangers and Super Novice to set up traps around the stones and all over the base. Skills that slow down enemies movement, such as Decrease Agi, and Quagmire are useful to give your team time to kill any enemies that might have stolen some of your stones. Area of Effect skills such as Storm Gust, and Lord of Vermillion are useful to control areas and slightly slow your enemies advance or escape.
Eye of Storm
- There will be two bases that you can control on the battlefield.
- Stay within the base area to dominate it.
- Score points overtime for each base you capture.
- Increase points overtime by capturing both bases.
- Earn extra points by capturing the flag in the middle and bring it to your base.
- First team that reach 100 points wins the game.
Additional Info:
- You can capture the flag in the middle of the map by attacking it.
- There will be a "HELP" emoticon above the character who pick up the flag. It is advisable to tell your team to protect you while carrying the stone or kill the enemy players.
- The player that has the flag must then move towards the base that their team controls. You will capture the flag by walking towards and touching the flag in either north or south base, whichever your team has control of.
- While you carry the flag, you will not be able to heal, and use skills. Your HP will drain over time as well.
Bossnia
- Attack enemy base and destroy each MVP guardian to earn points.
- You must capture Balance Flag in the middle of the map to do significant damage to the guardian.
- Each successful enemy MVP Guardian kill will give your team 1 point.
- First team that reach 5 points wins the game.
Additional Info:
- To capture the flag in the middle of the map, you and your team must damage it. Once your team successfully captures the flag, it will be renamed as either Blue or Red, depending on which team captured it.
- While a team controls the flag in the middle, that team will be able to significantly damage the MVP in their enemies' base. If you did not capture the flag, the damage you and your team deals to the MVP is low.
- After a team kills an MVP, the flag ownership in the middle will reset and it's once again a race to capture it. Take note that even though a team has already captured the flag in the middle, the opposing team can always steal the flag ownership by damaging it.
- This Battleground mode is often the fastest to complete, considering the objective is fairly straightforward. In the event that this mode drags on, some teams may consider defending their team's MVP to prevent enemies from killing it.
Domination
- There will be three bases that you can control on the battlefield.
- Dominate as many bases as you can to earn points.
- First team that reach 100 points wins the game.
Additional Info:
- You team will be able to capture a base by having one or more characters stand near the base flag.
- Likewise, the enemy team can steal base by occupying it with their team members.
Triple Inferno
- There will be three teams, your team and the other two are enemies.
- Collect enemy/teammate skulls and bring them to sacrifice totem to earn points.
- If you are killed while carrying skulls, all the skulls will be dropped.
- First team that reach 80 points wins the game.
Additional Info:
- You can collect skulls by touching them with your character.
Conquest
- If you are the attacker, destroy enemy defenses and break the Emperium/flag.
- If you are the defender, defend your flag until time runs out.
Additional Info:
- At the beginning of the match you are randomly placed into either the attacker or defender team.
- If you're the attacking team, take note that you cannot immediately rush to the enemies' main base where their Emperium/flag is located. Your team must break the guardian stones first that are located around the map.
- If you're the defending team, make sure to defend the Emperium/flag by killing your enemies, setting traps, slowing their advance, etc. Furthermore, you can also defend the guardian stones. As long as the guardian stones remain intact, the enemy team cannot break into the room with the Emperium/flag.
- If you're the defending team, you can use the flags/portals located at a distance from the Emperium to warp to certain points of a map to defend the guardian stones, or attack enemies from behind.
Rush
- Fight to capture the castle and organize your team to defend it.
- If you fail on the first capture, kill the defender and destroy the Emperium to win.
Additional Info:
- At the start, both teams must race to the and break it. Whichever team breaks the Emperium, that team must then defend it.
- If your team failed to break the Emperium first, your team must then attack the team that holds the Emperium and break it.
- A common strategy in defending the room where the Emperium is located is by setting traps and spamming area of effect skills near the entrance portal.
Battleground NPCs
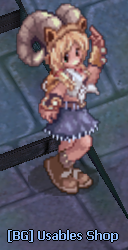
- See Battleground Usable Shop for more details
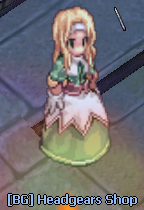
- See Battleground Headgear Shop for more details
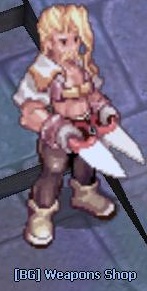
- See Battleground Weapon Shop for more details
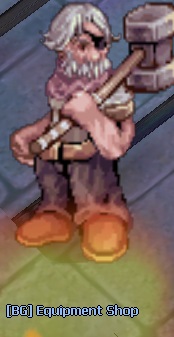
- See Battleground Equipment Shop for more details
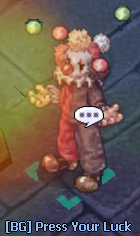
- See Battleground Press Your Luck for more details
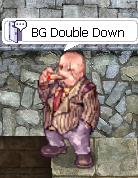
- Using the BG Double Down Token, you can bet a certain amount of Victory Badges
- For each bet, you will need 1x BG Double Down Token
- You can bet a maximum of 3 Victory Badges.
- If you win the next Batttlegrounds game, you will receive twice of what you've bet. If you lose, the Victory Badges will be lost.
- Make sure not to logout after making a bet. If you logout or select another character, the Victory Badges that you've bet will be lost.
- You can cancel your bet as long as you haven't joined any Battlegrounds yet after making a bet. If you chose to cancel, your BG Double Down Token, and Victory Badges will be returned.
Under Construction
| BATTLEGROUND NPCS | |||||
|---|---|---|---|---|---|
| NPC TYPE | PURPOSE / USE | ||||
| War Badge Shops | |||||
|
Donation Gems Shop |
Donation Auras Shop |
Donation Wings Shop |
Donation Headgears Shop |
||
| Baits | |||||
| Baits | |||||
| Baits | |||||

