Difference between revisions of "Cursed Spirit Quest"
(→Requirements) |
|||
| Line 1: | Line 1: | ||
== Requirements== | == Requirements== | ||
| + | {| style="border: 1px solid #aaaaaa; background-color: #f9f9f9; color: black; margin-bottom: 0.5em; margin-left: 1em; padding: 0.2em; float: right; clear: left; text-align: left; font-size: 100%; border-spacing: 2; width: 30em; vertical-align: top;" | ||
| + | | align="center" colspan="2" style="background-color: #F2BA42;" |'''Cursed Spirit Quest''' | ||
| + | |- | ||
| + | | align="center" colspan="2" style="background-color: #F2BA42;" | '''Requirements''' | ||
| + | |- | ||
| + | | '''Base Level:''' | ||
| + | |style="vertical-align:top; width:150pt;"| 60 | ||
| + | |- | ||
| + | | style="vertical-align:top;" |'''Item(s) (Consumed):''' | ||
| + | |style="vertical-align:top; width:150pt;" | [[File:Handcuffs.jpeg]]1 [http://db.irowiki.org/db/item-info/7345/ Handcuffs] | ||
| − | [[File: | + | [[File:Glass bead.jpeg]]1 [http://db.irowiki.org/db/item-info/746/ Glass Bead] |
| + | |||
| + | [[File:Bouquet.jpeg]]1 [http://db.irowiki.org/db/item-info/744/ Bouquet] | ||
| + | |||
| + | [[File:Holy water.jpeg]]5 [http://db.irowiki.org/db/item-info/523/ Holy Water] | ||
| + | |- | ||
| + | | style="vertical-align:top;" |'''Item(s) (Not Consumed):''' | ||
| + | |style="vertical-align:top; width:150pt;" | [[File:Grampa beard.jpeg]] [http://db.irowiki.org/db/item-info/2241/ Grandpa Beard] | ||
| + | |||
| + | [[File:Geek glasses.jpeg]] [http://db.irowiki.org/db/item-info/2243/ Geek Glasses] | ||
| + | |- | ||
| + | | style="vertical-align:top;" |'''Quest Pre-requisite(s):''' | ||
| + | |style="vertical-align:top; width:150pt;" | [[Biolabs Entrance Quest]] | ||
| + | |- | ||
| + | | align="center" colspan="2" style="background-color: #F2BA42;" | '''Rewards''' | ||
| + | |- | ||
| + | | style="vertical-align:top; width:150pt;" |'''Base Experience:''' | ||
| + | |style="vertical-align:top; width:150pt;"| | ||
| + | * Level 60-69 = 30,000 | ||
| + | * Level 70-79 = 40,000 | ||
| + | * Level 80-89 = 70,000 | ||
| + | * Level 90-175 = 90,000 | ||
| + | |- | ||
| + | | style="vertical-align:top; width:150pt;" |'''Job Experience:''' | ||
| + | |style="vertical-align:top; width:150pt;"| | ||
| + | * Level 60-69 = 30,000 | ||
| + | * Level 70-79 = 70,000 | ||
| + | * Level 80-89 = 90,000 | ||
| + | * Level 90-175 = 90,000 | ||
| + | |- | ||
| + | | style="vertical-align:top; width:150pt;" |'''Item(s):''' | ||
| + | |style="vertical-align:top; width:150pt;"| [[File:Old blue box.jpeg]]1 [http://db.irowiki.org/db/item-info/603/ Old Blue Box] | ||
| + | |||
| + | [[File:Speed potion.jpeg]]10 [http://db.irowiki.org/db/item-info/12016/ Speed Potions] | ||
| + | |- | ||
| + | | style="vertical-align:top; width:150pt;" |'''Quest Reward(s):''' | ||
| + | |style="vertical-align:top; width:150pt;"| Dangerous R | ||
| + | |||
| + | [[Odin's Temple Excavation Quest|Odin Temple Excavation Quest]] | ||
| + | |- | ||
| + | |} | ||
* Note: Before starting this quest, you may want to visit the Lighthalzen Mall, and pick up most of the items you need for the quest. (lighthalzen 199, 159) | * Note: Before starting this quest, you may want to visit the Lighthalzen Mall, and pick up most of the items you need for the quest. (lighthalzen 199, 159) | ||
Revision as of 04:00, 26 March 2019
Requirements
| Cursed Spirit Quest | |
| Requirements | |
| Base Level: | 60 |
| Item(s) (Consumed): |
|
| Item(s) (Not Consumed): | |
| Quest Pre-requisite(s): | Biolabs Entrance Quest |
| Rewards | |
| Base Experience: |
|
| Job Experience: |
|
| Item(s): | |
| Quest Reward(s): | Dangerous R |
- Note: Before starting this quest, you may want to visit the Lighthalzen Mall, and pick up most of the items you need for the quest. (lighthalzen 199, 159)
1. Enter the Biolabs by either completing Biolabs Entrance Quest or by using a Dungeon Teleport Scroll. Once you have access then you will need to find 1 pair of Handcuffs.
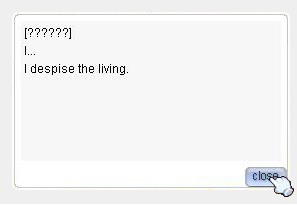
2. There are a few trigger spots that will start this quest for you. The following locations are areas that will trigger a dialog pop-up box if you are holding the Handcuffs:
- (lhz_dun01 147, 106)
- (lhz_dun01 239, 135)
- (lhz_dun01 66, 213)
- (lhz_dun01 225, 198)
- (lhz_dun02 244, 229)
- (lhz_dun02 60, 293)
- (lhz_dun02 267, 278)
- (lhz_dun02 94, 199)
- (lhz_dun03 244, 51)
- (lhz_dun03 123, 191)
- (lhz_dun03 74, 140)
Important Note: You don't actually need to see a dialogue box. Merely getting cursed at any one of the above spots means you have completed Step 2 and can move onto Step 3.
It is recommended to clear one of the above areas of monsters so as to avoid death but you can stand close to the cell and get the dialog pop-up to continue to the next step.
Now, keeping the Handcuffs, continue past the guard to Lighthalzen's slum area. You are looking now for the following locations (in any order):
- (lighthalzen 342, 280)
- (lhz_in03 178, 22)
- (lighthalzen 295, 227)
- (lighthalzen 364, 315)
Note: it is possible to trigger the dialogue from these spirits more than once, but is not necessary.
4. Once you have ventured around Lighthalzen and have triggered the spirits, talk to the Elder (lighthalzen 346, 263).
- The Elder has great wisdom regarding the research that has happened in recent years.
- Talk to the Elder and pay attention to her story.
- She will then help you with getting rid of them. Be honest to her and let her know that you can't remember every bad thing you have done.
- Follow along with her as she helps you with how to deal with what you have just learned.
5. The mini-map will show you where you need to go next, just pay attention to the blinking marker placed there. It is directing you to the Rekenber headquarters. (lighthalzen 103, 244).
- Now following the Elder's instructions you will need to head to the Rekenber Headquarters.
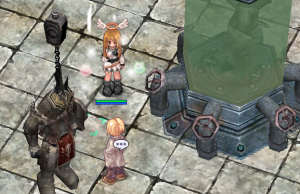
6. As you enter into this building you will walk forward and trigger another spirit (lhz_in01 113, 150)
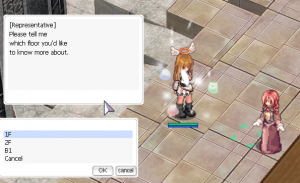
7. After triggering the spirit you will want to continue forward towards the Representative (lhz_in01 114, 181)
- Ask about the Corporation's History.
- She will then guide you to the Library.
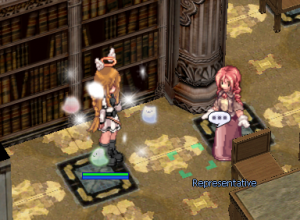
Now head to your left into the Library and talk to the Representative (lhz_in01 27, 247).
- Talk to her about the Corporation's History and listen closely to what she says.
- You will need to talk to her again and discuss Rekenber's Businesses with her to find out more about what has been going on.
- She will then guide you to look up the Guidebook to find more about Rekenber's businesses.
9. Clicking on the Rekenber Guidebook and reading what little information there is will help you understand the mission that was at hand.
- You will need to venture more into this building to find out some other information.
10. There is another location to check out on the 2nd-floor (lhz_in01 272, 227) and you will find another spirit.
- Realizing that you might be in over your head and yet still curious as to what is going on, you head back towards the Library.
- As you get closer you see a Rekenber Guard, almost like you walked right past him earlier.
11. Talk to the Rekenber Guard (lhz_in01 35, 226) and he will request your ID to be confirmed.
* You will need to wear a Grandpa Beard and Geek Glasses, as you can tell from his own ID, before he will let you pass.
- Once you enter the room, you will want to head to your right.
- You will see 3 rooms. Each room has a very specific purpose for the testing and creating that is done here.
12. Head to the room on the far right, and walk towards the middle of the room (lhz_in01 206, 129).
- A dialogue box will appear and you will be taken back in time.
13. Once you have entered, you will stumble upon a conversation between Doctor Varmunt and a representative of the Rekenber Corporation.
- It would seem that the brilliant Doctor isn't happy with what he was asked to do.
- After the conversation you will be transported back to your own time.
14. Now that you know about the fake Ymir's Heart and the developments they are trying to accomplish with the Airship and the Guardians, you should go see and talk to one of the scientists in this area.
15. Talk to the Mad Scientist (lhz_in01 273, 121), and offer him your help.
16. Talk to the Mad Scientist again as it would seem he was too distracted to give you the right attention you requested for.
- Ask to speak to him again, and he will give you a hint of what he needs. Round and Shiny? Must be a Glass Bead!
17. Bring back a Glass Bead to him again and politely ask him about his work.
- He will give you some details about what he is working on and how he feels it will change the world.
18. Moving into the North room (lhz_in01 278, 168) you will circle around a table in the middle of the room and find something on the floor.
- Oh wait! It's a door to another room.
- As you enter you notice this room looks just like the one you came from.
- If you move around the room you will see what looks to be some sort of testing going on.
19. Talk to the Scientist and you see he is having a conversation with...what looks to be a Peco Peco.
- Upon listening to this conversation the Scientist is having with himself and the Peco Peco you realize that he throws down what he claims to be a cheap trinket.
- Pick up this Pendant and let's see if we can find its rightful owner.
- Someone has to know something about this item.
- He will give you an Old Pendant
- You remember that the Elder said to return once you find what you are looking for.
20. Head back to the Elder (lighthalzen 346, 263) and see if she can help by showing her the pendant.
- The pendant looks to have a curse on it, something that she claims to be able to fix.
21. Return to her with 5 Holy Water and a Bouquet (from Prontera's Flower Girl) as she has requested.
- Once you return to her with the 5 Holy Water and the Bouquet she will calm the curse and ask you to return the pendant to its rightful owner.
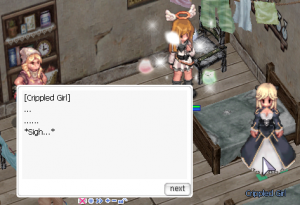
22. Head north in the slums district (lighthalzen 319, 321) and you will come to a house with a Crippled Girl (lhz_in03 31, 162) that looks to be in some serious discomfort.
- Talk to the Crippled Girl (lhz_in03 31, 162).
- Show her the pendant, and listen to her story of what the pendant means to her.
- Then break it to her gently and then offer her some comfort.
- If you tell her the brutal truth and get kicked out, simply keep retrying to enter the building and the door will eventually unlock.
23. After you have comforted her, you can head back out of their house and continue your quest to find out what more there is about this spirit.
- As you exit the house, you will be confronted by the spirit again, but this time the spirit is grateful for what you have been able to do to help him and blesses you for what you did.
- Experience amounts received
24. The search for a true answer hasn't stopped, and you figure that this spirit that continues to follow you has something to do with the Rekenber Corporation and you feel the need to continue there.
25. Speak with a Secretary; Secretary Slierre (lhz_in01 286, 226).
- Ask her about the slums, only to find out she doesn't know much about them.
- Talk to her again and ask about the Laboratory, and she gives you a vague question and pushes you off to the help desk.
- Realizing she isn't going to answer your questions in a roundabout manner, you come out with it and ask about Wolfchev's Research.
- Stunned, she inquires about why you asked, and you explain that you are a friend of his.
- She tries to brush you off, but you reply with W-Wait!, and you ask again about Wolfchev's Research.
- She explains that she is not able to answer your questions but if you have something to show her then she is more then willing to help you.
- So you ask about Wolchev's Test Subjects, ignoring her statement of not being able to help.
- At this point she attempts to sway the conversation towards the positive aspects of the research and you claim that his experiments are suspicious and you don't trust the corporation.
- Not claiming to know anything, she asks for proof, so you show her the evidence.
- You show her the Handcuffs and Slierre becomes bothered by this proof.
- You ask what Wolfchev is doing now, and you explain that, Yes you are suspicious about his research, and question about Mr. Wolfchev and the creatures in Regenschirm.
- She takes your claims and asks that you give her time to go over it all and see if there is any truth to this report.
26. Being that you want answers now, you continue to pester her by requesting the results and what was found.
- After a few minutes of pestering her she comes back and informs you of the dreadful truth that Wolfchev had done unauthorized research and what you had found was the truth.
- You ask what he was doing, and she tells you what she was able to find out about his deadly research.
- She will reward you with an Old Blue Box & 10 Speed Potions.
- It is now possible at this point to start the Dangerous Rumors quest.
27. (Optional) Now that you have confirmed the unauthorized research, you rush back to the Mad Scientist (lhz_que01 94 2) to put a stop to his research but when you arrive you find that he has vanished and that all he left behind were his well documented research files.
